Before you begin carving your walkingstick, you need to be familiar with the woods that work best. You will also want to know about various techniques for whittling and what David Allen uses to carve his walking sticks. Check out some famous quotes and tips on how to carve walking sticks. These are some tips to help you create the perfect walking stick. Continue reading to find out more. This is how you can create a walkingstick that's unique and functional.
Woods that can be used for carving a walkingstick
The most difficult part of carving is finding a blank that is straight. You may come across a few trees with branches that appear bent too far to be useful, but you should keep searching until you find a straight piece. A straight branch can be harvested during winter when the sap is moving from the roots to the branches. This will make the wood more stable, and less likely to split. If you don't have the time to wait for spring, you can still harvest the wood while it is still green.
Several species of wood can be used for carving a walking stick. Chestnut is a sturdy wood from North America. Because it is dense, it can be used to make walking sticks and other similar tools. The wood grain in this species is often open or slightly closed. It makes for a strong walking stick that feels solid and smooth. It is also extremely attractive and is often used in carve. Some species can be carved with the bark left in place.
How to make a walking stick
There are several basic ways to carve walking sticks. First, select a piece wood with a distinctive texture. Some woods display distinctive bark marks or colors, while others show natural swirls. You might want to paint or lacquer these characteristics. In addition, you may want to carve the wood shaft to make it more attractive. Make sure that the stick you choose is straight, free of branch shoots or hard spikes.
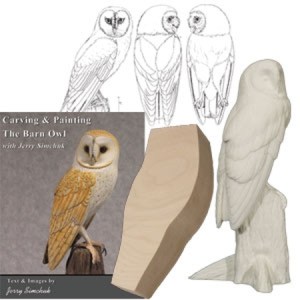
This book will tell you all about wood types and different carving styles. The most common designs are snakes and lions. You can carve realistic figures like fish, eagles and deer, in addition to snakes. These artists are often regarded as God-given. This book is suitable for advanced and novice carvers.
Tools used by David Allen for carving a walking stick
David Allen started making toys when he was young. He used a pocketknife from his childhood to create them. Because he was too young for a knife to be used, he had the knife hidden from his family. His creations were toys like slingshots as well as utilitarian objects, such shoeshine containers and other toys. Allen was 15, when he became paralysed and began to make walking sticks. Allen worked with a pocketknife, a chisel and a chisel to carve the wood.
Allen developed his designs independently, digging around the roots of saplings and deciding on what to carve. He believed that the design should be "seeable" before it could ever be carved. This process was similar to that of many African-American artists. Allen often had visions or dreams about the design that he wanted. In this way, he was able to create a stick that would evoke the feelings and emotions of his community.
Famous quotes about carving a walkingstick
Carving walking sticks is a complex task that requires a well-prepared blank. The hardest part of the project is finding a straight blank. You have many options, but it takes persistence to find one that is straight. It might appear bent beyond practical usage, but continue searching until you locate one. When sap is flowing from the roots to the branches of the tree, it's best to trim your stick in winter. The sap makes the wood softer and less likely that it will split.
The wood's texture, color and grain are important considerations when selecting wood. Each piece of wood may have unique textures and colors. The lacquer will make these natural swirls even more beautiful. It is important that the wood shaft be free from any branch shoots or hard spikes in order to achieve a smooth finish. This will make the process much easier. No matter the material you choose you need to think about the finishing options you'll use.
FAQ
How long does it take to finish a piece of furniture?
It depends on the wood type you choose, the complexity and the amount you apply to the finished product. Hardwoods require more care than softwoods. Hardwoods tend to be more expensive that softwoods. But they last longer, and resist moisture better. Finishing furniture can take anywhere from one week up to three months.
How much will it cost to get started?
Because each project is unique there are no exact numbers. Consider these factors if you need to estimate the amount of money that you will require.
-
Cost of materials
-
Tools and equipment
-
The time spent on the project
-
The hourly rate
-
How much profit can you anticipate to make
-
You can hire help, regardless of whether you have a plan.
For those just beginning, it may be a good idea to start small with simple items like boxes and picture frames. As you gain more experience, you will be able tackle more complicated projects.
Do I have the potential to make a decent living doing this?
Yes! Many woodworkers are already doing so. According to U.S. Bureau of Labor Statistics (BLS), woodworkers earned a median annual salary of $34,000 in May 2012. This is significantly higher than the national average, which is $31,000 per year.
What material would your recommendation be to learn woodworking?
Start with softwoods, such as pine or poplar. After you are comfortable with the softwoods, move to hardwood.
How much should a Woodworker Charge per Hour?
The hourly rate of a professional woodworker depends on many factors including experience, skill level, availability, location, etc.
An hourly wage for skilled woodworkers is between $20 and $50.
A less skilled woodworker can charge as low at $10 an hour.
What else should I know about woodworking in general?
It is easy for people to overlook the work involved in furniture making. The hardest part of the process is actually finding the right wood. There are so many wood options that it can be difficult to choose the right one.
A problem is that wood doesn't have the same properties. Woods can warp, split, or crack over time. Before purchasing wood, you should consider these factors.
Statistics
- Average lumber prices rose about 600 percent between April 2020 and May 2021. (familyhandyman.com)
- If your lumber isn't as dry as you would like when you purchase it (over 22% in Glen Huey's opinion…probably over 10-15% in my opinion), then it's a good idea to let it acclimate to your workshop for a couple of weeks. (woodandshop.com)
- Overall employment of woodworkers is projected to grow 8 percent from 2020 to 2030, about as fast as the average for all occupations. (bls.gov)
- The best-paid 10 percent make $76,000, while the lowest-paid 10 percent make $34,000. (zippia.com)
External Links
How To
Tips on how to drive a nail in wood
First, choose the right size and type of tool to drive a nail through wood. The most common types of hammers are claw hammers, sledgehammers, mallets, ball peen hammers, and hatchets. Each type of hammer comes with its advantages and disadvantages. A claw hammer, for example, is the best choice if you need to hit nails hard. However, it's not easy to know exactly where the impact will land. A sledgehammer allows you to hit large areas simultaneously, but it is too heavy and cumbersome to use for small tasks.
After selecting the right hammer, you will need to place your hand flat against one side of the head. The handle should rest comfortably in your hands. You can grip the handle with your fingers, but not so tight that it causes injury. Your wrist should be relaxed while you hold the hammer straight upwards. Swing the hammer back towards the ground, with your aim at the middle of the nail. You should feel the impact of the hammer striking the nail. Practice swinging your hammer on a block of wooden until you feel comfortable.
When you're ready to start driving the nail, hold the hammer in front of you close to your body. You will need to position the nail so it is parallel to the wood. Keep your eyes on the tip. Swing the hammer forward, then follow through with the motion of the hammerhead. This can be repeated several times to increase the speed of your swing. Once you've mastered the technique, try adding power to your swings. Then, raise the hammer from your shoulder to bring it down. This will help you put more energy behind each of your moves.
After you have nailed the hole, take the hammer off the nail. To remove the remainder of the nails, you can use a screwdriver/pry bar. Keep the nails heads in line with the surface of the board to prevent splitting the wood.