Sharp edges in wood carving tools enhance your pleasure of carving. These are some common methods for sharpening wood carving tools. Sharp edges are more durable and will last for a longer time than dull ones. Sharp edges allow for more efficient use of your tools. Sharp edges facilitate carving and maximize cutting performance. The following are three common ways of sharpening wood carving tool. Read on to learn more. - How to sharpen a sharpening stones.
Carving pleasure is enhanced by sharp edges
Sharp tools are not only better for carving, but tools with razor-sharp edges make it easier. Sharper tools require less effort, and are easier to control during carving. The smooth surface of a well-cut blade makes for a smooth cut. Sharp tools are key to a successful carving project. You can achieve the best results by regularly sharpening your carving tools. Regular sharpening can keep them sharp and will make your carving job much easier.
Although sharp edges are a pleasure to carve, they can cause blisters. Wood's natural texture can be rough so regular handling will make the skin more resilient. Calhouns will develop from the blisters. However, this is a slow and painful process. If blisters are visible in your carving, you can change how you hold the tools. It may take some practice, but the effort will be well worth it.
When sharpening your knives, begin by using a sharpening kit and a fine-grained stone. You must also inspect for damage at the edges. Chips at the edge will require you to grind harder. A dull edge may only require minimal grinding using a finer stone. Finally, test the knife by cutting through a piece of rope or paper. You may not need to sharpen the knife if it has been dull for some time.
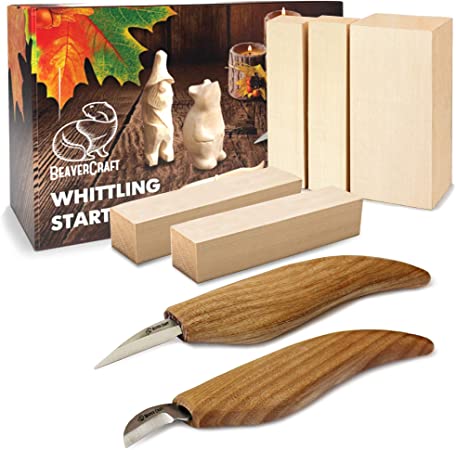
Common methods for sharpening wood carving instruments
There are many different methods of sharpening wood carving tools. There are several options for sharpening wood carving tools. Oil stones require that oil be applied to stone's surfaces to prevent metal particles forming on it. Ceramic and diamond stones don't require oil and are ideal for sharpening carbide wood carving tools. This article will address the most common methods for sharpening wood carving tools.
Leather strops can be used to remove the wire edge from a blade and polish it. A leather strop is good for all tools. However, some carvers prefer a more textured one. Flat leather strops are best for straight tools and the edges of gouges. A leather strop with grooves is for those who are serious about their work.
The traditional bench chisel is sharpened at 25 degrees with a five degree secondary bevel. Modern alloys can't be used with these angles and may break. As a result, you need to raise the angle of the bevel. This requires more force but will allow you to control the bevel better. Block planes are also usually sharpened at 20 degrees.
A sharpening iron is required
To sharpen wood carving tools, you can use a sharpening stone. The stone is made up of grit which is a crystalline mineral that is much harder than steel. It also has sharp edges. A lubricant is required to help the stone cut and prevent metal particles becoming embedded. After you have sharpened your tool to a sharp edge, it will be easier for it to cut wood with minimal resistance. The strop, typically made of leather is used to clean the edge and remove any burr.

There are various types of sharpening stones available in the market. There are oilstones and waterstones as well as ceramic stones. The oil stones use oil as a lubricant to avoid fine metal particles from burying themselves in the stone surface. Both ceramic and diamond stones don't require any lubricants. They both work well in sharpening the carbide wood carving instruments.
Sentima's sharpening stone is an example of a top-quality system. Both a coarse and fine corundum stone are featured in this sharpening system. This material is uniform in grain, which makes for a fast cutting process and smooth finish. The unique design makes it easy-to-clean. The sharpening system is made out of durable materials and will last years without losing quality.
FAQ
Is it difficult to start my woodworking business?
It's not easy to start your own woodworking business. You will need to adhere to many legal requirements. But, this doesn't mean you need to go through all of the trouble of setting up your business. Many people prefer to join existing companies. You only need to pay membership and tax fees.
What material would you recommend to start learning woodworking?
Start with softwood like pine, poplar and ash. After you are comfortable with the softwoods, move to hardwood.
How can a woodworker start making money?
Many people are beginning to learn how build furniture to launch an online business. However, if you're just getting into furniture building, there are other options than selling on Etsy. You can sell at local craft fairs. For those who want to build their own furniture, you might offer workshops. Perhaps you have some experience as a carpenter/builder and would like to offer your services, such as remodeling homes and creating custom pieces.
How much money will I need to get started?
There are no exact numbers because every project is different. Here are some factors to help you estimate how much money you will need.
-
Materials cost
-
Tools and equipment
-
Time spent on the Project
-
Hourly rate
-
How much profit do you expect to earn
-
You can hire help, regardless of whether you have a plan.
Start small, if possible. You can make simple boxes or picture frames if you're just getting started. As you gain more experience, you will be able tackle more complicated projects.
How do you calculate woodworking costs?
The most important thing to remember when calculating costs for any project is to keep them as low as possible. Always ensure you are getting the best possible price for materials. It is important to take into consideration all factors that can impact the cost of your projects. These include time, skill and experience. If you want to get an idea of what you can expect to spend on different types of woodwork projects, check out our guide to the average price of common household DIY tasks.
Statistics
- Woodworkers on the lower end of that spectrum, the bottom 10% to be exact, make roughly $24,000 a year, while the top 10% makes $108,000. (zippia.com)
- Most woodworkers agree that lumber moisture needs to be under 10% for building furniture. (woodandshop.com)
- If your lumber isn't as dry as you would like when you purchase it (over 22% in Glen Huey's opinion…probably over 10-15% in my opinion), then it's a good idea to let it acclimate to your workshop for a couple of weeks. (woodandshop.com)
- Overall employment of woodworkers is projected to grow 8 percent from 2020 to 2030, about as fast as the average for all occupations. (bls.gov)
External Links
How To
How to properly operate a handsaw
The wood is cut into pieces using a hand saw. These saws are most commonly used to cut wood into pieces. A handsaw can be made of metal or other plastic. It cuts through material such as wood and plastics.
Hand saws have the main advantage of cutting at precise angles without needing to adjust the blade. It's also much easier to sharpen them than power tools. However, there are some disadvantages as well. They can be very heavy and bulky so it is important to take care when you transport them. Additionally, if they are unfamiliar, it is possible to injure oneself.
There are many ways to hold a handheld saw. While cutting, keep your fingers away from the blades. If you don't, you might get hurt. While holding the saw, make sure you place your fingers around its handle. Keep your thumb close to the blade. You won't accidentally touch it.
When using a hand saw, you should never put anything under the piece of wood you're cutting. The blade could slip if you do this. Before you start cutting, ensure that you inspect the area. Make sure no nails or screws are hidden beneath the wood.
When working with a handheld saw, safety goggles are essential. They keep dust out of your eyes, making it easier for you see what you are doing. Safety glasses are also useful because they protect your face from flying debris.
If you plan to work with a hand saw, you must first learn how to operate it safely. Next, practice until your confidence is high enough to begin cutting. Once you master the basics you'll be able to easily cut most anything.