
There is a fascinating history behind fretwork, and it dates all the way back to the mid-16th century. This article will discuss the history and influence of architecture on fretwork patterns as well as common components and techniques. Read on to learn more about this ancient craft. This page can be saved for future reference. Here is a quick history of fretwork.
Patterns from diverse origins
The history behind fretwork can be traced back more than 3,000 years. It began with Egyptian furniture found in sealed tombs. The art form was eventually introduced to the rest. It has been a major part of modern decor, for both floors as well as walls. You can find patterns from different sources in many materials, such as wood, metal, and stone. Here are some major sources of fretwork.
The 12th century saw the development of the trellis. The original purpose of the trellis was to protect the interior of buildings from the harsh sun's rays and promote air circulation. Many designs derived from Islamic geometric patterns have found their way into modern interior design. A few of these patterns have been used in decorative elements of Edwardian and Victorian architecture.
Influences by architectural period
The period from which fretwork originated, as well as the general period in architecture, influences its style and form. Modernism created a new style for architecture that didn't use ornaments but was governed by a universal language. This period paved the way for postmodernism, a style that reflects and echoes the styles of the past. Modernism was an important shift in architecture. However, it had a huge impact on fretwork design and style.
The history and evolution of architecture are almost as old than the history or humankind. Although styles are different, they show how societies and climates have changed. Different architectural styles emerged from different periods and often reflect the changing climate and landscape. Throughout history, architectural movements evolved out of new ideas and construction techniques. These movements helped define artistic trends across the globe.
Common components
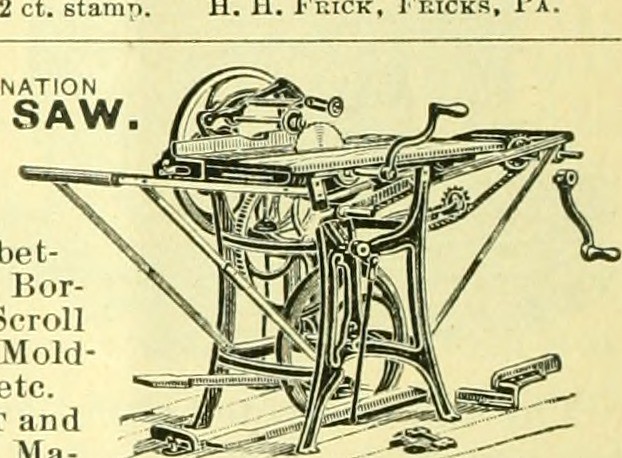
The history of fretwork is as old as civilization itself, and there are several periods of use for this ornament. The geometrical pattern that gave rise to fretwork is a result of its origin in Greece. Frets were used by the Greeks to decorate pottery and paint, and also in building and other structures. Fretwork can be made in geometrical patterns. Victorians first used the treadle and scroll lathes to cut fretwork.
While the Moors occupied much of Spain during the early Gothic period, their designs influenced both Portuguese and Spanish art and decoration. Because of this, fretwork is one of the oldest forms and styles of decorative art. This amazing history dates back to prehistoric times. The earliest known examples of fretwork date from the 12th-century. The history of fretwork, however, is far more complicated. The Moors also made significant contributions to the architecture and decoration of the Renaissance.
Techniques
You can find articles on fretwork within national or international publications. However, they are not always impartial. You can find great resources to help you make an informed choice. These are three excellent examples. Let's look at the first. D. Denning has written a book about fretwork and marquetry. It also includes information on its history and techniques. It also provides instructions for overlaying, inlaying and scroll sawing.
It was first discovered in fretwork on Egyptian furniture. The pieces were taken from their sealed tombs. It has since been widely used in modern decor and has become a key component of many interiors. It is used widely on floors, walls, and other surfaces. The examples below will help you learn more about this stunning and original design. You'll be amazed at how old these techniques are! These techniques can still be used today.
FAQ
How does a beginner woodworker earn money?
Many people are beginning to learn how build furniture to launch an online business. But if you're just getting started building furniture, there are other ways to earn money besides selling on Etsy. You could sell at craft fairs or local events. A workshop could also be offered for people who are interested to learn how they can build their own furniture. You might be able to offer services like remodeling homes or making custom pieces for clients if you are a skilled carpenter.
How can my shop be organized?
A designated place to store your tools is the first step towards keeping your workshop clean. Keep your tools away from dust and debris, so they stay sharp and ready to work. You can hang tools and accessories with pegboard hooks.
How do you calculate woodworking costs?
When calculating the costs of any project, it is important to keep them as low and affordable as possible. Always make sure you get the best price on materials. It is important to take into consideration all factors that can impact the cost of your projects. These include time, skill and experience. Check out our guide on the average cost of common DIY projects to get an idea of how much you can spend on woodwork projects.
How much money will I need to get started?
Each project is unique so there aren’t exact numbers. Consider these factors if you need to estimate the amount of money that you will require.
-
Material costs
-
Tools and equipment
-
Time spent on the project
-
Your hourly rate
-
How much profit do you expect to earn
-
Hire help
Start small, if possible. You can make simple boxes or picture frames if you're just getting started. As you gain experience, you'll be able to tackle more complex projects.
What is the difference of plywood and particleboard?
Plywood consists of layers made from wood and pressed together by pressure. Plywood comes in several thicknesses and is commonly used for cabinets and flooring. Particle board is made of sawdust and resin that has been compressed into large blocks. It is used primarily for home improvements. Both types are sturdy and easy to cut.
Where can I locate free woodworking plans
To find free woodworking plans, you don't have to buy any magazines or books. Just search Google. Enter "free woodworking", and you will see hundreds upon hundreds of websites offering free plans.
How can I tell what kind of wood I am working with?
Always read the label when purchasing wood. It should have information about the wood species as well its moisture content and whether any preservatives were used.
Statistics
- Most woodworkers agree that lumber moisture needs to be under 10% for building furniture. (woodandshop.com)
- In 2014, there were just over 237,000 jobs for all woodworkers, with other wood product manufacturing employing 23 percent; wood kitchen cabinets and countertop manufacturing employing 21 percent. (theartcareerproject.com)
- The best-paid 10 percent make $76,000, while the lowest-paid 10 percent make $34,000. (zippia.com)
- The U.S. Bureau of Labor Statistics (BLS) estimates that the number of jobs for woodworkers will decline by 4% between 2019 and 2029. (indeed.com)
External Links
How To
How to stain wood
Stain wood is a process that involves applying chemicals to the surface of wood, which changes its color. This chemical reaction causes the wood to change from white to brownish red. Oak is the most commonly used wood for staining, but other woods can also be stained.
There are several ways to apply stains to wood surfaces. Mixing the stain in a solvent such as turpentine and spraying it onto the wood is one method. Some methods involve a mixture of water and dye that is applied directly to the wood. Stains can also be mixed into paints and varnishes, becoming part of the finish coating.
Preparing the surface is the most important step in staining wooden surfaces. Clean the wood to get rid of any grease, dirt or other substances that might be detrimental to the stain's application. Sanding the wood smooths out rough spots and scratches. The next step is to choose the stain type you want. There are two types of stains that can be used: penetrating and non-penetrating. Penetrating stain penetrates deeper into wood than nonpenetrating, making them suitable for dark colors like mahogany. Light colors such as maple work well with non-penetrating stain.
You will need to decide on the type of stain you want to use, and then prepare your tools. You can use a paintbrush to apply stains. This allows you spread the liquid evenly over the surface. To remove any stains left behind after painting, you will need some rags. If you plan on mixing the stain yourself make sure that you have enough containers to hold the different components.
After you have prepared the materials, you can clean the area where you want to stain the wood. Use soap and warm water to remove dust and grime. Wipe the entire piece of furniture with a rag dampened with clean water. If you intend to stain darker wood, make sure you get rid of any debris.
Next, spray the stain. The stain can be applied by spraying or brushing the stain onto one end of the furniture. Move slowly and carefully along the grain of your wood until you reach its opposite end. The stain should not drip off of the wood's edge. Let the stain dry completely before proceeding with the next steps.
Clear polyurethane is used to protect the painted surfaces. Apply three coats polyurethane sealer. Allow the third coat of polyurethane sealer to dry overnight before applying the final coat.